Step 1: Hover on Loads Calendar

Step 2: Click on Add Event (For Adding A New Event)

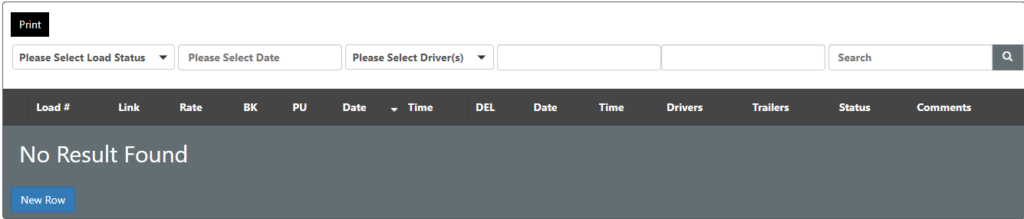
For Accessing all published Events / Loads, Please click on All Events.

Step 3: Add Load Details

  1. Enter Your Load # 
  2. Select Driver from the list who is going to do that load.
  3. Select Event / Load Status by Clicking on the status.
Instruction 3

Step 3: Add Load Details (Continued)

  1. Enter Your Load # 
  2. Select Driver from the list who is going to do that load (This is very Important).
  3. Select Event / Load Status by Clicking on the status.
Instruction 3

Step 4: Add Load Details (Continued)

  1. Click on the existing Driver Phone # to select.
  2. Click on Add New Driver Phone # to add a new phone number and click on Add New Button.
  3. Click on existing Truck # to select.
  4. Click on Add New Truck # to add a new Truck number and click on Add New Button.
  5. Write Trailer # and click on Add or press Enter.
  6. Click on Choose from the most used Trailer #’s to select from a list of  most used Traier #’s.
Instructions 4

Step 5: Add Load Details (Continued)

  1. Click on Start Date to Select Pickup Date.
  2. Select Pickup Time.
  3. Click  on End Date to Select Delivery Date.
  4. Select Delivery Time.
Instructions

Step 6: Add Load Details (Continued)

  1. You can write Broker Name or Code in the Code Field So Brokers can find their all their loads using that field.
  2. You can write Broker Dispatch Email to send Email Updates directly to Broker. 
  3. You can  write Important Instructions for Drivers.
  4. Load Pick  # Number if any.
  5. Pickup Location Name.
Instructions

Step 7: Add Load Details (Continued)

  1. Pickup Address.
  2. Pickup Date.
  3. Pickup Time.
  4. Delivery Number If any.
  5. Delivery Location.
  6. Delivery Address.
  7. Delivery Date.
  8. Delivery Time.
Instructions

Step 8: Add Load Details (Continued)

For More than One Pickup / Delivery Locations Only.
  1. Pickup Locations & Address I.E
    Pickup: Amazon. @02:00 PM
    Address: 123, Brampton ON
  2. Pu Date.
  3. Multiple Deliveries.
  4. Delivery Date.

Step 9: Add GPS Tracking

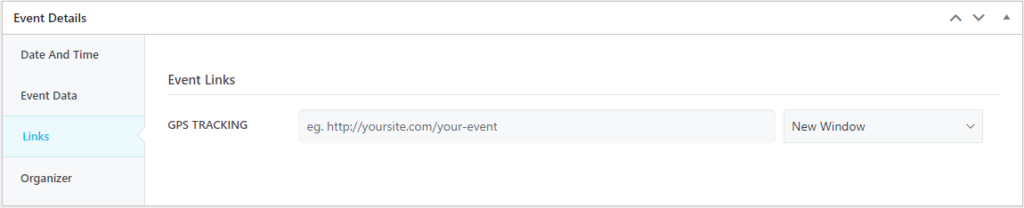
Paste GPS Tracking Link in the Link Field if any.

Instructions

Step 10: Select Driver

  • Select Driver name from the list for existing Driver.
  • Click on Insert a new Organizer to add a new Driver.
  • For New Driver, write the name of Driver.
Instructions

Step 11: Publish a Load

  • Click on Publish Button to publish a Load.
  • For making  changes to existing loads after making changes click on update button
Instructions

How to Add Loads on Rundown Sheet (Back-End)

  • Click on Tables and then click on Rundown Sheet.
  • Click on Add Data.
  • Adding Load Link in  the table Link Column, Right Click on View and Click on Copy Link Address and then paste it in the table link column.

How to Add Loads on Rundown Sheet (Front-End)

  • Please visit RS Page that will be your domain name followed by rs I.E mydomain.com/rs .
  • Click on Add New Row.